Introduction
Extension of screen refers to expanding your computer's display across multiple screens, thereby creating a desktop extension. With a multi-monitor setup, you can use more than one display, and each screen can function as a separate workspace by providing additional screen space and the freedom of multitasking.
Here are some key benefits of extending a laptop screen:
- Additional workspace
- Enhancement of multitasking
- Improved productivity
- Efficiency of data analysis
- Better presentation and collaborations
- Streamlined workflow
- Easy Drag and drop of content
- Easy monitoring
How to Extend Your Laptop Screen on Windows?
Extending your laptop screen allows you to increase your workspace and enhance productivity. Learn how to extend your laptop screen on Windows below:
Using a second monitor as an Extension
Extending your laptop screen to a second monitor on Windows allows you to increase your workspace and be more productive. Here's a step-by-step guide on how to grow your laptop screen using a dual monitor:
Step 1: Hardware setup
- Use an appropriate display port, HDMI, VGA, or USB-C cable for connecting your laptop and the second monitor.
- Check whether the second monitor is powered on and set it to the correct input source.
Step 2: Software Configuration
- Right-click on the desktop. From the context menu, select 'Display settings.' Or tap on Settings -> System -> Display
- From the display settings, scroll down to the 'Multiple displays.'
- Under multiple displays, tap on the drop-down menu and then on 'extend these displays.'
- Arrange the display icons labeled as numbers 1 and 2 per your physical setup by dragging and dropping them. Tap on the 'Apply' option.
- Make adjustments to individual display settings by making changes in orientation, resolution, and scale.
- If you want to set one of the monitors as the primary display, scroll down to multiple displays and opt for the 'Make this my main display' option.
- Tap on the 'Apply' option.
- Once all the adjustments are made, tap on the 'Keep changes' option.
Using a tablet as a second screen
Connecting a tablet as a second screen with your laptop lets you use it. Here are specific prerequisites to keep in mind before you start:
- Stable Wi-Fi connection.
- Trustworthy third-party app (Spacedesk) on laptop and tablet.
Steps to use (Using USB):
Step 1: Complete downloading and installation of Spacedesk on your laptop and tablet individually. Open the app on both devices.
Step 2: You will notice that the tablet will detect your laptop automatically. Make its selection for establishing a connection.
Step 3: Once the connection is made, your tablet is ready for use as an extended display—Configure display settings using your laptop's system settings.
Add On: Using SpaceDesk Wirelessly
Step 1: Connect your laptop and tablet to the same Wi-Fi network. Then, use the Spacedesk icon and open the Server Properties option on your PC.
Step 2: Go to the Network tab, look for Server IPv4 addresses, and write them.
Step 3: Tap on the 'Connect' button on the app. Enter the IP address and tap on 'Connect.'
How do you extend your laptop screen on a Mac?
Like Windows, you can extend your laptop screen on Mac as well. Here's how you can do it by using two popular methods.
Using a second monitor as an Extension
Extending your laptop screen on a Mac using a second monitor is an easy process. Here's how you can do it with the step-by-step guide.
Step 1: Hardware Setup:
- Using an appropriate cable like a mini display port/ HDMI/ USB-C/ Thunderbolt, etc. connect your Mac with the second monitor.
- Power on the second monitor and set it to the correct input source.
Step 2: Software Configuration:
- In the top left corner of your screen tap on Apple menu.
- From the drop-down menu, make a selection of 'System preferences.'
- Tap on 'Displays' and then on the 'Arrangement' tab.
- Check the box with the message 'Mirror displays' for turning off mirroring.
- In the arrangement tab, you will be able to see both displays. Drag and drop the display icons to arrange them accordingly.
- Set one monitor as the primary display and drag the white menu bar box to the desired monitor.
- Now tap the 'Display' tab to adjust each monitor's resolution and other display settings.
- Once all the settings are made, close the system preferences window.
Using a tablet as a second screen
You can use a tablet as a second screen on a Mac by using third-party apps designed for the purpose. Here, we are going ahead with a popular app, Duet Display.
Prerequisites:
- Make sure you have connected your Mac and iPad to the same Wi-Fi.
- Purchase and download the Duet display app using the App Store/website on your iPad and Mac. Complete its installation on both devices.
Steps to use
Step 1: Connect your Mac and iPad using a USB cable and open the Duet Display app on both devices. Grant the required permissions requested by the app.
Step 2: Look for options to configure the display settings on your Mac in the Duet Display app. Opt for 'Extend' on your iPad to use it as an extended display.
Step 3: On your Mac, open the 'Display' settings and arrange them per your physical setup by dragging the display icons.
Step 4: Use your iPad as a second display.
Add On: Using the Duet Display App Wirelessly
Step 1: Start the app on both the devices you wish to connect.
Step 2: Make a sign-in on both devices.
Step 3: Once you see available devices on the app, tap the 'Connect' button.
Alternative Solutions
While using a second monitor or a tablet as an extension is a great idea, and it can enhance your productivity on a significant basis along with multitasking capabilities, there are some potential drawbacks that you need to consider;
- Cost
- Space requirements
- Power consumption
- Screen size and resolution
- Hardware/Software compatibility
- Setup complexity
- Portability issue
- Compatibility with certain software
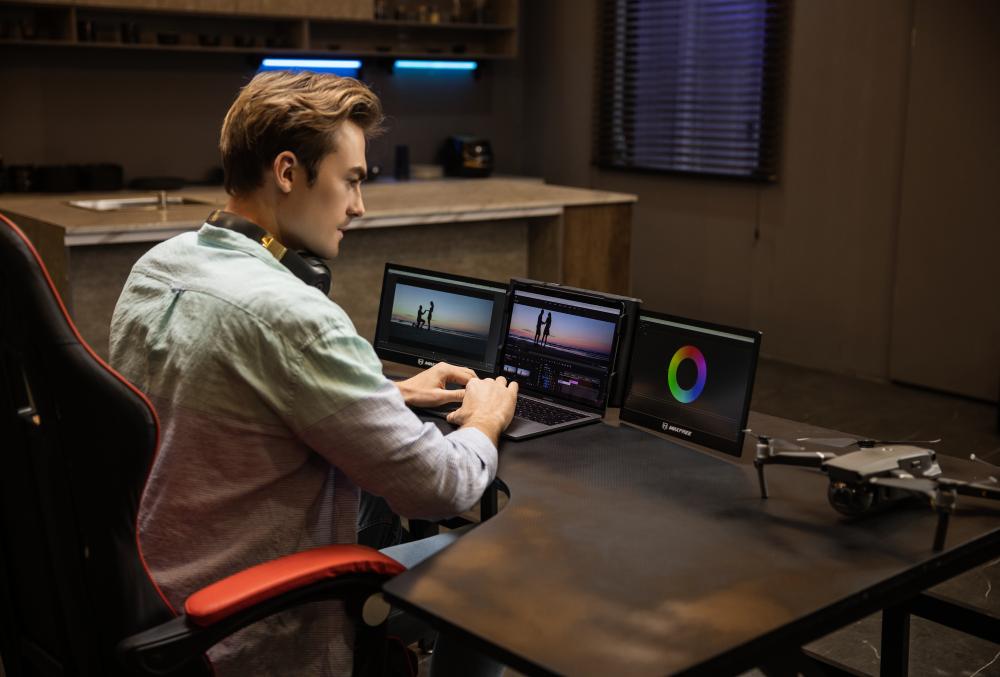
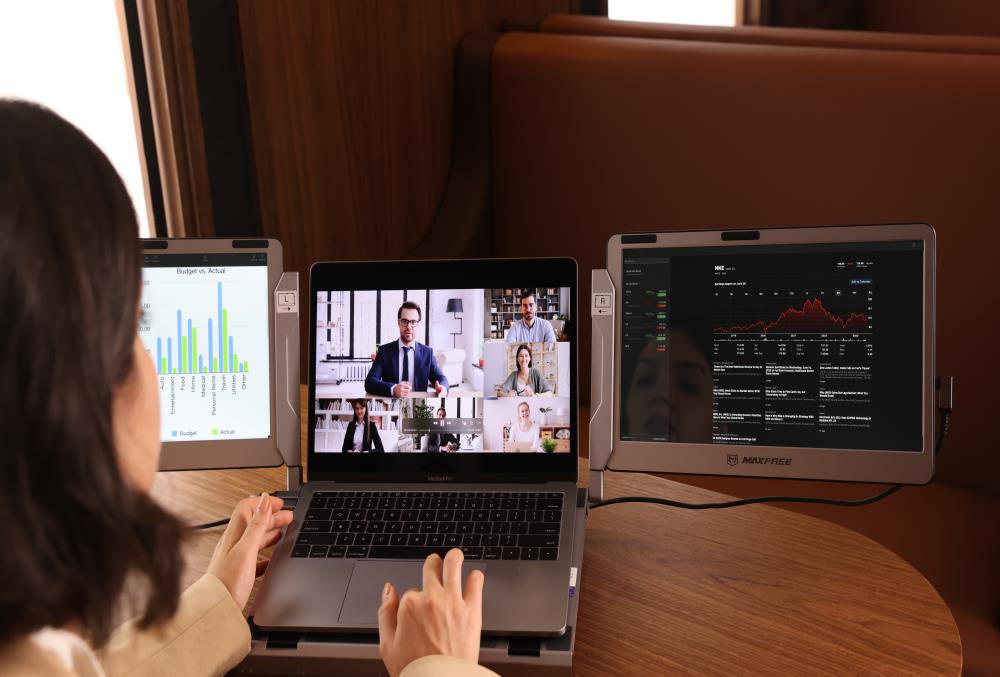
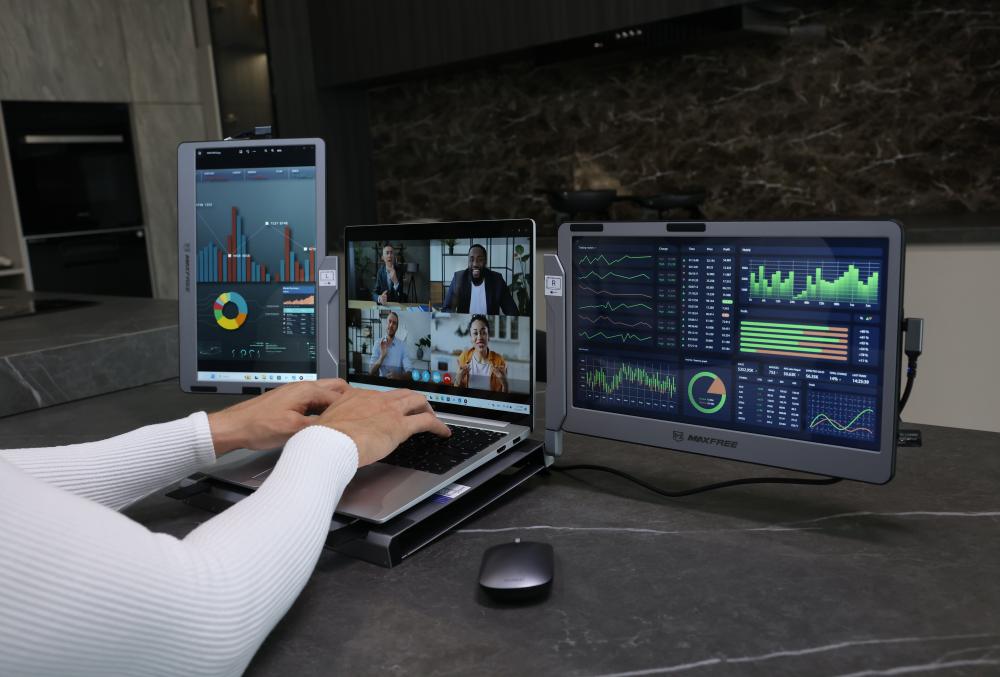
In such a situation, portable monitors can give you more portability with the on-the-go extension. A laptop tri-screen extender offers flexibility and multiple monitor setups in the work environment. These offer enhanced productivity, efficiency, and versatility as they can be used with various devices such as laptops, gaming consoles, tablets, smartphones, etc.
Maxfree Laptop Screen Extender
Being a compact and versatile solution, the Maxfree laptop screen extender creates a tri-screen setup using your laptop. Its height adjustment feature helps to customize viewing height, providing an ergonomic viewing experience. It gives the flexibility of adding additional monitors on an individual level, either horizontally or vertically, to come in alliance with your needs. Maxfree offers a compact design and good screen quality that helps enhance your productivity as an on-the-go option.
Features
- Provides comfortable viewing angles through 360-degree rotation
- Portable and flexible stand
- It does not require clipping screens on a laptop
- Enhanced cooling along with an intelligent base
- Exceptional connectivity along with plug and play option
Conclusion
Setting up a screen extension involves adjustment of display settings in the control panel or the system preferences of the OS. As a user, you can arrange the display per your work requirement, set the resolution, and provide specifications for display duplication or its extension.
We have provided valuable steps for using a second monitor or a tablet as an extension on Windows/Mac devices. However, this restricts portability and adds to the cost. If you are a frequent traveler, it may not be feasible, forcing you to switch to a Maxfree laptop screen extender that pops as an on-the-go solution.
Leave a comment
This site is protected by reCAPTCHA and the Google Privacy Policy and Terms of Service apply.